Showing posts with label vegetarian. Show all posts

Sunday, September 21, 2014

Cajun Corn Fritters

testing, testing. Is this thing on?


Ferris Bueller was right, you've got to stop and smell the roses before life passes you by. It's been almost a year since I've sat down to write a post- well, since I've hit the 'publish' button. Everything has changed and everything is still the same. My baby is a strong willed toddler, just over a year old. My eating habits are finally settling back into something I'd call normal and modestly health aware. I'm getting outside, getting stronger and teaching full time. I'm almost motivated to cook again, though I miss the days of spending as long as I'd like on a recipe. I gaze longingly at the glossy photos in my magazines and remember the days of glazed short ribs and chocolate ganache covered cakes.

Now, it is all about quick, easy, filling foods. Foods we can all eat. We, that's right, my husband and my baby and myself. We eat the same foods. That's happening. I'm thrilled.

The other night I decided to finally use some of a seasoning blend I'd been tasked with tasting, a Wildtree Cajun blend. I have gone to and hosted a few of the Wildtree workshops (you show up with baggies and produce/meat, and bag up and make 10 meals that you pop into your freezer) and have loved so much of it. Talk about a time saver, holy cow. But, prepping mostly meaty meals on top of trying out a Whole 30 and doing mostly paleo for a while, I was ready for something less carniverous.

Que corn. Mmm. Funny story, as my husband and I embarked on our first Whole 30, he lovingly helped out by making dinner one night. When I got home, with the dog and the baby, dinner was ready and I was thankful. Then I noticed he had made corn on the cob with dinner. I was so hungry, I sat down and ate the meal but didn't touch the corn. I knew it was not allowed in the context of the Whole 30 adventure, but I didn't want to burst his bubble. Corn, it acts like a veggie sometimes! Tricky corn.

Anyway, that corn lingered in my memory. It looked so sweet and juicy. I'd heard someone on the radio talking about corn fritters and decided that was it, corn fritters and cajun seasonings. And so, this happened. Cajun Corn Fritters.

They were simple, quick and easy. I whipped up some goat cheese and dash of sour cream and chives to make a little dipping sauce. I threw some avocado slices into the oven and voila, dinner. Though I wasn't super keen on the avocado fries, the rest of the meal held up to my internal hype. Yum.

Give them a shot, I'd bet they'd be good with a variety of spice blends. Try it out, why not?

Cajun Corn Fritters

makes about 8-10 two inch fritters

For the fritters:

1 1/2 cups of corn (cut off the cob, I used about 3 cobs. Cobs? is that right? you know what I mean)
1/2-1 tsp (adjust to your taste) cajun spice blend
1 tsp salt
4 tbsp flour
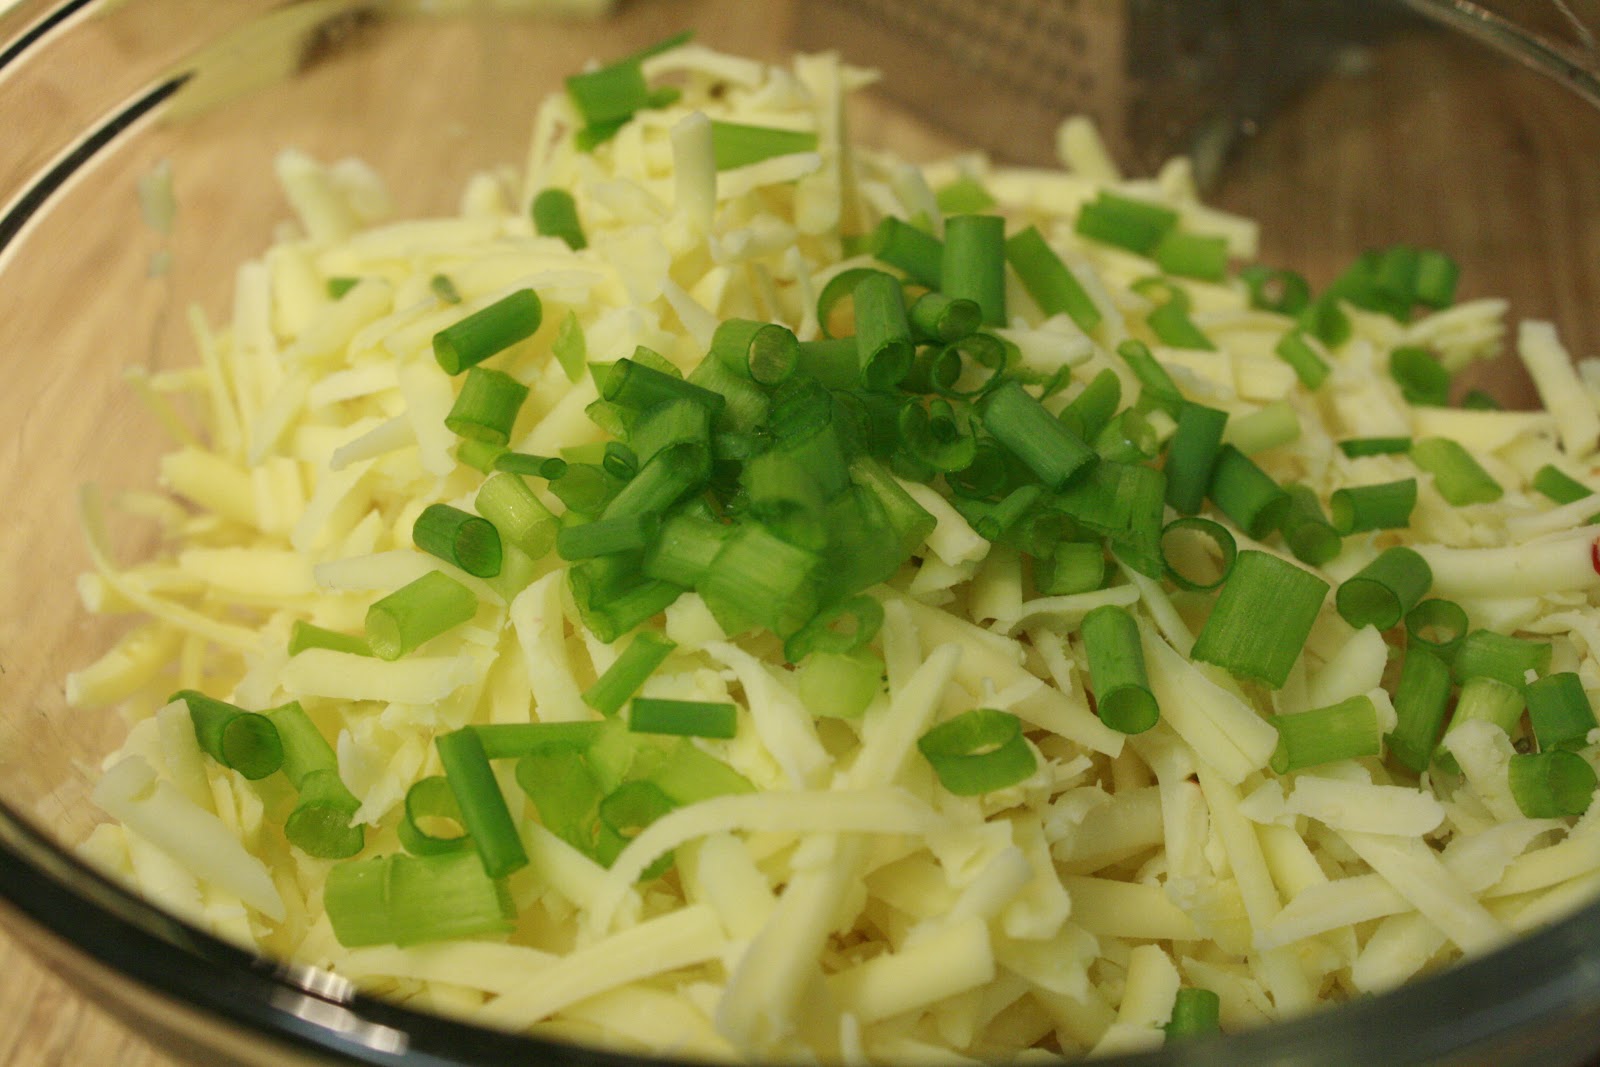
1 bell pepper, chopped
1 green onion, chopped
1 egg
Butter, for the pan

For the dipping sauce:
2-3 oz goat cheese
2 tbs sour cream
1/2 tbsp chives, chopped

Mix up all the ingredients for the fritters except the egg. Heat your pan up and toss some butter in, about a tablespoon or so. While the butter is warming up, mix the egg in with the fritter mixture. It will look gross and strange and slimy, but also colorful and lumpy and soon to be delicious. Things always looks strange before they become beautiful, like those horrible contour make up tutorials on Pinterest.

When the pan is ready, use a tablespoon to scoop the mixture into small patties on the pan. Cook for about three minutes or until golden brown, then flip and repeat. Let them cool on a plate with a paper towel and eat them up soon. They were delicious right off of the pan.

To make the dipping sauce, simply mix the sour cream and goat cheese in a small bowl with a fork. Goat cheese hates to mix up with anything in my experience so far, so really tell it who's boss. Then toss in the chives and taste. Add salt and pepper to your liking, and feel free to adjust the sour cream/cheese to get the consistency you crave.

Enjoy!
-m

Wednesday, February 22, 2012

Sweet Potato Muffins


About two years ago, I fell in love with roasted sweet potatoes. I had been avoiding eating them ever since every single health related magazine article said I just had to try this 'super food'. I prefer to come to ideas on my own, or at least convince myself that I did.

What a goof, I know. I used to tell my high school tennis coach that I enjoyed doing my backhand wrong. Yes, enjoyed. He would come over and try to correct my form and I would resist. I'd tell him to go away. And I wonder why I never did as well as I wanted to...

I firmly believed that eventually the right way would just miraculously come to me with one swing and I would forever be relieved of my wrongness. I see the error of my ways.. kind of. I'm still guilty of this stubbornness on occasion. Case in point, I probably should have tried sweet potatoes sooner.


Dates, dates, lovely dates. They add so much to these muffins!

I roast up a big bag of sweet potatoes fairly regularly, about once or twice a month. I eat them sometimes with my smoothie for breakfast, as an afternoon snack or with dinner. I just adore them. Their flavor is amazing to me- the wonderful not-quite-potato-more-like-squash texture and the natural sweetness. They are incredibly satisfying.


So aesthetically pleasing, no?


I've done all this roasting, but rarely do anything else with them. That's why this recipe has knocked my socks off something crazy. I've made it three times. I love it, but at first I thought I'd be the only one.


Do you see the chunks of sweet potato? The little bits of orange there at the bottom and top? No? Trust me, it's the best part.

I made mini versions of it the first time I made them, to share with some friends. They were gone so fast! Even when I said "whole wheat sweet potato muffins with dates".

Seriously.

People didn't run away screaming "What's wrong with you!?". I thought they might; the ingredients can sound a tad bit strange on their own, but just imagine each of those flavors mixed together and baked. Heavenly, eh? Well, so far, everyone I share these with just loves them.


These are great right out of the oven, but I usually make them for breakfast/morning snacks for the week. Even my picky husband gobbles them up, though I need to solve the 'sticks to the wrapper' problem as it really drives him bonkers.


Sweet Potato Muffins

adapted from Good to the Grain 


ingredients
1 cup whole wheat flour
1 cup all purpose flour
1 tablespoon cinnamon
1 teaspoon baking powder
1/2 teaspoon baking soda
1/2 teaspoon freshly grated nutmeg
1/4 teaspoon all spice
2 ounces (1/2 stick) unsalted cold butter
2 large roasted sweet potatoes, about 3/4 lb (I sometimes use 4 small ones if that's what I bought)
1/4 cup sugar (or raw sugar)
1/4 cup brown sugar
1 egg
1 cup buttermilk
1/2 cup plain yogurt or kefir
6 large medjool dates, pitted and chopped

Preheat the oven to 400 degrees. Roast sweet potatoes on a baking sheet covered with parchment or foil. Roast for 1-1.5 hours, depending on their size. The bottoms should be dark and almost burnt looking and the juices should be caramelizing. After they have cooled, peel them and leave them in tact.

Lower the oven to 350 and grease your muffin pan. Use muffin liners if you wish, though they stick sometimes to the paper cups.

Sift the dry ingredients together. In a small bowl, mix the buttermilk and yogurt.

Add the butters and the sugars to a medium sized bowl and mix either with a standing mixer or by hand. Mix until creamy, about 3 minutes. Add the egg and just half of the sweet potatoes (yes! just half!) and mix until combined. Scrape down the sides of the bowl. On low speed, add the dry ingredients until they are just partly combined. Follow this up by adding in the buttermilk mixture and mix until combined.

Add the dates and separate them over the surface so they don't all clump together. You want them spread throughout the batter. Next (my favorite part!), add the remaining sweet potatoes and mix until only barely combined- you want pockets of sweet potato in the batter. Scoop the batter into 10 muffin tins, skipping every other muffin cup if you want to keep the tops from touching as they bake.

Bake for 35-40 minutes, or until the bottoms are dark and tops are springy to the touch. The author of the cookbook suggests placing the muffins on their sides to cool, as pictured above. They can be stored for 3 days or frozen for future enjoyment.

Enjoy!
-m


Wednesday, February 8, 2012

Smoothies Again!


As you may or may not know, I'm a big fan of a morning smoothie. Over the past eight months or so  I have had a smoothie for most of my breakfasts. You may also know that I'm a sucker for a good time saver. In fact, if you are holding out some great time saving secret you better tell me because if I discover it and find out you knew about it all along, well I will be mighty disgruntled for at least three whole minutes.

I have evidence to support that claim, I truly do. When I was about 20, just trying to make everything work as a preschool teacher and a full time college student, I felt so overwhelmed by household duties. All that cleaning and cooking and bill paying was just dreadful. Cleaning was especially awful because of our horrible hard water. The ring in the bathtub was so incredibly disgusting. I had never seen anything like that nasty bathtub ring. At first I was sure something was wrong with the bathtub, not with my cleaning routine. When it finally dawned on me that the filthy, white and yet brown, rough ring around the tub was caused by my water and my washing, well I was infinitely grossed out.

I resolved to clean it up right quick and be done with it forever. I would be a preventative cleaner, proactive not reactive. I tried every cleaner I could reasonably afford. I used lemon juice and baking soda and all manner of household combinations. I even resorted to scrapping it with a soup spoon. In the end, that spoon was the only thing that left a dent- and that was more literal than figurative. I was near my wits end, almost a year of trying fruitlessly to clean this stubborn ring, when one of my coworkers just happened to mention her undying love for the mr. clean magic eraser. She proudly mentioned its wonderful ability to clean her bathroom to a sprightly shimmer. I could hardly believe her, I was so skeptical of the commercial's claims. I realize now that I should have been happy to hear this. Thrilled. Ecstatic. Enthralled. But my very first thought was that she had been holding out on me. She had this amazing secret and was scrubbing away her bathtub ring within minutes while I grabbed my trusty soup spoon and spent what felt like hours chipping away at those hard water deposits. About three minutes later, after much brooding and begrudgingly nodding as the conversation moved forward, I decided I had to try this thing out. I did and it was awesome and although I now buy the target version of this wondrous scrubber, I'm grateful for that conversation but now I know to ask in advance.

Speaking of asking, any ideas on how to get a floor to sweep itself? Or how to get Shelby to wipe her own paws after running through the muddy backyard?

Well, this is my newest trick and I'm here to share. My morning smoothie revamped. About a month or so ago I was tempted by the idea of buying a large case of Odwalla premade smoothies from Costco. I saw the big box of them and thought of all the time I would save each morning (about 3 minutes, yeah, seriously, three whole minutes my friend). Then I took one look at the ingredients (sugar! yikes!) and put that thought out of my mind. Instead, I decided to make an entire batch of smoothies for the week on that Sunday night. And I did just that. But by friday the top of my smoothie had a brown tint and tasted vaguely of bad bananas. Um. gross. You should have seen the look on my students' faces as I tried to swallow that initial Friday-old-banana-yuckiness. I must have had quite a look on my face too, it was a priceless moment. We laughed. I threw the smoothie away.

For the past few weeks I have been trying to figure out how to make the smoothies ahead of time but retain their fresh Monday/Tuesday look and taste. The answer was in my backyard: lemons. So simple!
That's my freshly squeezed lemon juice in the jar up front. So many lemons, so little time..

Here's how I work it:
1) Fill up your blender with an assortment of fruit and maybe some greens. I prefer 3 fairly fresh bananas, about one bag of frozen berries, 1/3 bag of frozen spinach and some blueberries.
2) Pour in some liquid, about halfway filling up the blender. I used some beet/carrot juice and some pomegranate juice and a little citrus juice of your choice. 
3) Let it sit for a bit, an hour or two, to make it easier to blend.
4) Get your jars ready!
5) Blend up the smoothie and pour equal amounts in each jar.
6) Pour about a tablespoon of lemon juice on the top of each smoothie before placing the lid on top.
7) Place them all in the fridge and enjoy three more minutes of blissful coffee sipping in the morning!


Tips:
1) I have found that using fresher bananas results in a fresher taste come Friday
2) Orange juice seems to work well in place of the lemon juice
3) Wash out the jar as soon as you get home, wooowweee does mold grow fast in those suckers


I have been making my smoothies each Sunday night this way for about three weeks and so far, so good. I added apples and pineapples and loved it. I also added coconut oil and did not love it. Live and learn!

Enjoy!
-m

Thursday, December 29, 2011

Cheese Enchiladas

I have spent what feels like a very good amount of time lately at other people's houses cooking, eating and celebrating all kinds of wonderful things. It's been a hoot and while I'm totally exhausted (still) I came away with some interesting new insights. Really, I gained new, important, valuable, eye opening information whilst celebrating my holidays away.

lovely Christmas dinner table


This is what I mean about always learning, by the way. I'm completely enthralled with the act and idea of learning something new, no matter how inconsequential it may seem to anyone else. For example, I recently made tamales at a good friend's house. This is the same fabulously roomy (space! What a hot commodity!) kitchen that housed our Wednesday Thanksgiving this year and where I spent a good day making ninjabread men in ugly sweaters (see pic below if you don't believe me). I noticed the same thing on all occasions- cleaning as you go. It happens. Seriously, I saw it.


This is how it went down: 

We prepped.
Then someone jumped in and washed everything we just used to prep. There were 4 or 5 of us, so those extra hands were nice, but on the day I was making cookies and just one other person was prepping and cooking wildly, then she did all the cleaning solo. 
Then we cooked some of the previously prepped stuff.
Then, like magic, someone cleaned it all up!*

When we sat down to eat, everything was cleaned and the kitchen was immaculate. It was impressive, to say the least. 

*Yes, sometimes it was me, but mostly it was not. I just stared in awe.
ninja bread men in ugly sweaters

I have heard about such things occuring, but I have never experienced them myself (or I wasn't paying attention, my mom's kitchen never seemed messy but I was probably off in la-la land while all that cleaning occurred) I cook mostly at home, alone in my decently sized but relatively tiny kitchen and I just make one mess after another. It's kind of how I seem to roll through life, leaving organized chaos in my midst. I know where it all is, but it looks kinda nutty to the casual observer.
Dylan is always commenting on my ability to take a spotless kitchen and go all tasmanian devil on it with one fail swoop of my wooden spoon.

It's a bit demoralizing, really. I never want to cook after I've spent a good chunk of time scrubbing the kitchen down. And cooking is what I really love to do. It's quite a conundrum.


This is when my frozen meals really blow my mind. I have about twenty frozen soups and pastas ready for just this moment, when my kitchen looks great and I'm spent and I do not particularly like to get takeout or eat out on week nights. I used to throw down some delicious frozen meals from trader joes on nights like this, but I feel a little better about the stuff I make myself. We do the occasional gnocchi, no lie, but I know all the ingredients in my frozen potato leek soup and that soothes my weary soul (ha! weary. a bit dramatic, I know).

homemade enchilada sauce


Here is one of our favorite meals I keep in the freezer. Just a note: it's such a fabulous recipe that I never get a chance to take a picture of the final result... how unsatisfying, I'm so very sorry. You'll just have to make it yourself to see what it looks like I guess. Then take a picture and send it to me so I have a frame of reference, ok?


These enchiladas were inspired by the Pioneer Woman's recipe for sour cream enchiladas. The only real change is the fact that I didn't like the ingredients in the enchilada sauce, so I made my own- dag nabbit.
I got this step, adding a bit of sauce to the mixture going in, from the custodian at my school. She gave me what is probably a killer enchilada recipe, but I haven't tried it yet because I'm so in love with this one. Soon! Soon.


By the way,  I'm under no delusion that these are 'healthy'. They are super tasty and satisfying and a great treat for after you've rolled out all the sod for your backyard (finally! yes! That happened! And I made enchiladas to celebrate! I love exclamation points! and cheese.)

Step by Step: Filling and rolling your enchiladas

Doing all these steps within the pan itself is genius and I thank my school custodian again for that tip. Makes so much sense! It's the kind of thing I might never ever think of myself.

Whenever I make these, I double the batch and make some more to freeze- though this batch makes two little 9x9 freezer trays pretty easily. This way, we never run out. Oh yeah. Enchiladas, always at hand. It's just how things work over here. 


Cheese Enchiladas
serves 6 (or two very hungry people twice with leftovers!)

inspired by the Pioneer Woman's Sour Cream Enchiladas 


print this recipe 

ingredients

2 15oz cans of tomato sauce
1/4 cup vegetable oil
1 tablespoon+ chili powder (adjust to your taste)
1/2 tablespoon cumin
salt and pepper to taste
2 cups sour cream
2 1/2 - 3 cups grated cheese (cheddar or jack work well)
about 1 cup chopped scallions
12 corn tortillas (or a flour/corn hybrid- I love those)

Preheat the oven to 350 degrees. Get your 9x13 baking pan ready. 


Put the two cans of tomato sauce in a medium sauce pan over medium high/medium heat. Add the oil and the seasonings and bring to a boil, then reduce to a simmer until the sauce retains that dark red color you know you're waiting for, about 10 minutes.
Mix the grated cheese, scallions and sour cream in a medium sized bowl. Add a dollop of the enchilada sauce and mix together.

Get your set up just right, I prefer to heat the tortillas up in the sauce as opposed to in oil, but you can use oil if you wish. I have a small frying pan loaded with some sauce heating up to about medium. Then I add the tortilla for a quick bath in the sauce, flip it over after about 15 seconds and then toss it in the 9 x 13 in pan, where you intend for it to end up, and fill it and roll it right in there. Continue with the rest of the enchiladas. Top with extra sauce and cheese and bake until the cheese is bubbly, 15-20 minutes.


Enjoy!
-m