Showing posts with label freezer. Show all posts
Tuesday, June 12, 2012
Pesto Garlic Bread
Summer is finally here! Our last school day was Friday, and while I was sad to say goodbye to the students, I am so grateful for some time to myself. The past three weeks have been so nutty- I swear I've had more sugar in the past month than I've had in the past 12 months. I feel a bit out of whack, but looking forward to a restful and restorative summer.
I'm sure I'll share more about that later, but for now I'm going to share something that..isn't quite restorative.
Hm, well, it restored my beliefs in homemade compound butters!
I bought this cookbook a few months ago and this jumped right out at me. Certain parties in this household love buttery, cheesy garlic bread. Like, love love love. I'm ambivalent, I prefer pizza if I'm going to go all bread and cheese. But I do like to see everyone smile so, I'm often on the lookout for a good garlic bread for those fancy dinners I sometimes like to prepare at home when I'm sick of restaurants. It happens!
This recipe is good for two loaves of your favorite bread- I like a good whole grain bread. You can bake one up and freeze the other for a quick side dish.
This bread was rated as a top 5 contender for favorite things made in my kitchen. Seriously. Make it. Make someone's day (maybe your own!) and save that leftover basil butter, you'll thank me later.
Pesto Garlic Bread
By Tyler Florence
ingredients
1 pound butter
1/2 bunch of fresh basil
10-15 garlic cloves
1/4 cup grated parmesan cheese
2 loaves of crusty bread
sea salt
pepper
Put all the ingredients (except the bread, duh) in a food processor (or blender, as I did) and whip it up until it is all mixed up and creates a gorgeous basil butter.
Next, slice the bread almost all the way down, leaving the slices hanging together (see photo above). Butter the bread by spreading basil butter between each slice of both loaves, then spreading the remaining butter on the tops of the loaves. Honestly, I end up with a good 1/2 cup left and I freeze it and cook up veggies with it later. Yum.
Wrap both loaves with foil and either bake at 350 for 20-25 minutes or freeze for up to a month. When you take it out of the freezer, simply bake it at 350 for 30-40 minutes (mine tends to take longer than the suggested 30 minutes). Let it cool a bit before slicing again and serving.
Enjoy!
-m
Monday, October 3, 2011
Chili
Hello, October!
I have been dreaming about fall foods, colors, sights and smells for about a month now.
I'm so glad the weather finally cooperated. Rain, rain, rain!
It sent me into a chili kick. Chili is very close to my heart. It is the first thing I feel like I really learned how to cook. I mean, I knew how to do some things with eggs and boil pasta and pour some jar stuff on it, but chili was different. I researched recipes, found a few I liked, and settled in to read them all. I started to notice a pattern. This was the first time I had noticed such a pattern in a recipe and I think it was because I had three of them staring at me on the kitchen table.
Also, I'm a bit competitive sometimes and my family does this chili cook-off thing every fourth of July and I was determined to have an edible entry. I think the competitive side of me and the side that loves a good pattern collided and bam! Chili! It made sense to me and it's been a go to in my cooking arsenal for the past eight years.
So, here's my step by step pattern fantastic way of making chili.
I made two types of chili, don't get too confused seeing my two pots and two meats and all that. Just focus on the patterns and then add/delete/adjust as you please! That's what's so amazing about it, you can make it your own. Here's my version:
Chili: Step By Step
Start with some garlic and some onions, I'd use a few cloves and an onion for one batch of chili. Saute with some oil in a pan at medium high heat.
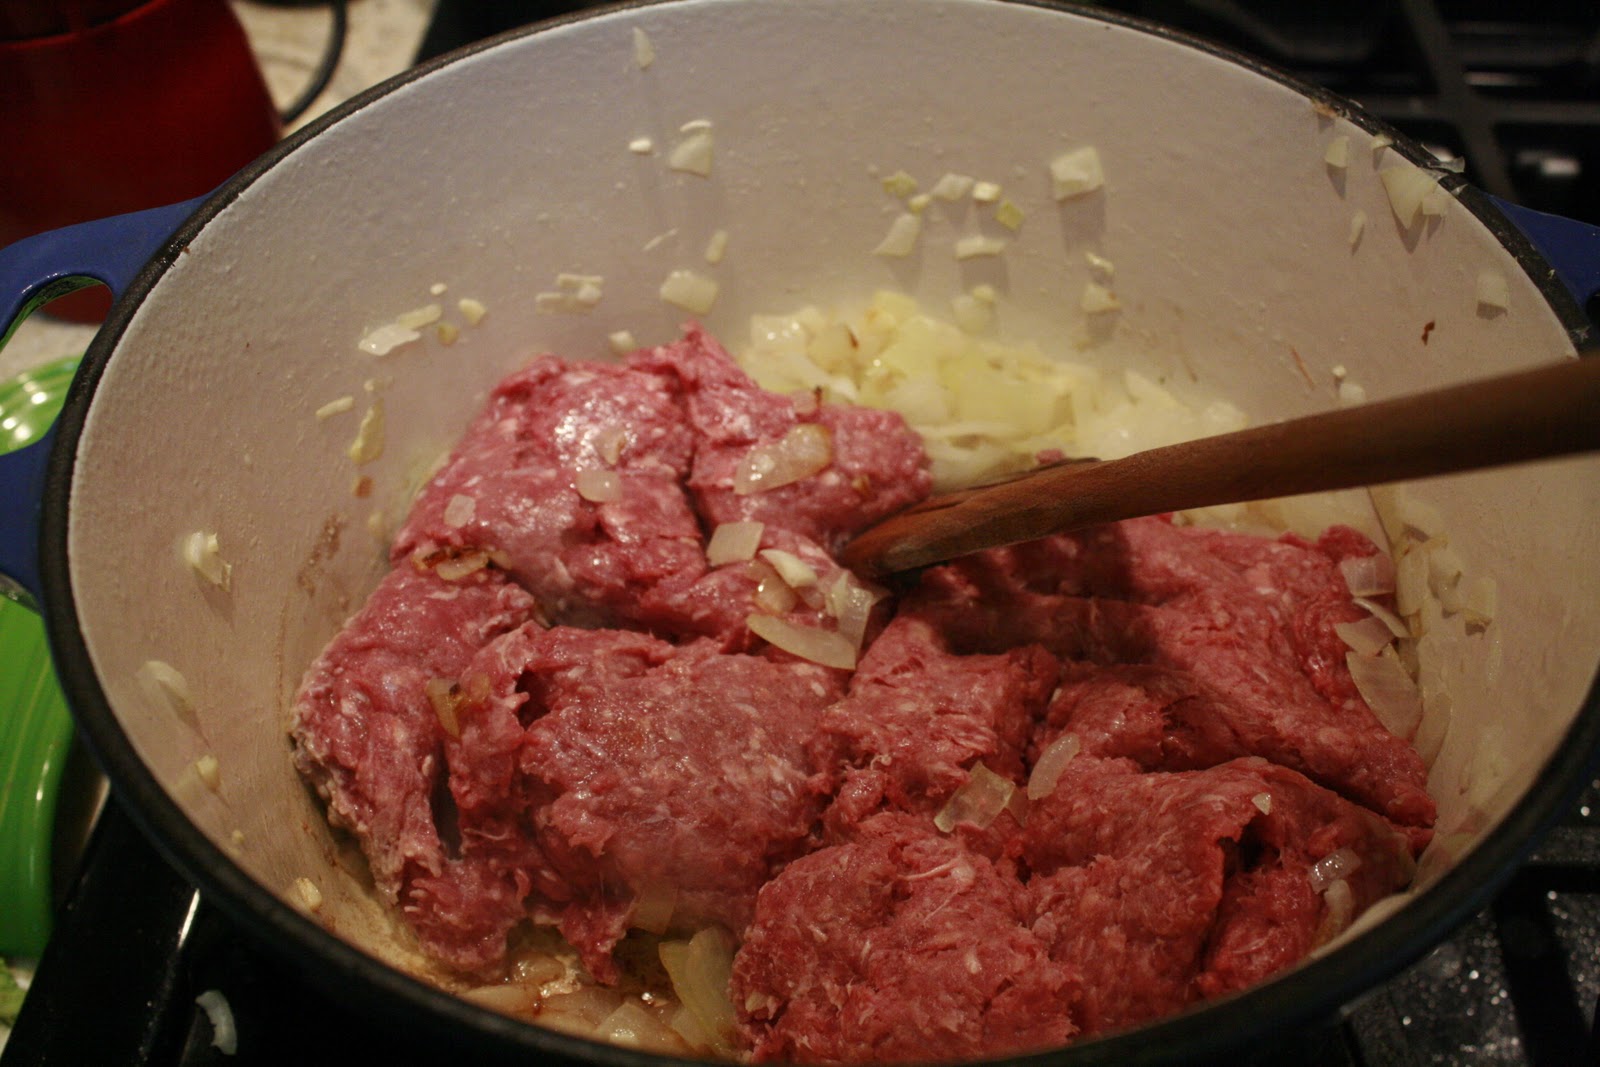
Then toss in your choice of meat or meats! I usually use two pounds of meat- such as turkey and chicken sausage, chorizo and beef. Today, I had one batch with some ground turkey and another batch with two (yikes!) pounds of ground beef and brown it in the pan with the onions and garlic.
Beefy.
After the meat has browned a bit, I add my spices. I just use my palm to measure out about a teaspoon of each cumin, cayenne pepper and salt. I put some pepper in there and about a tablespoon of chili powder. If you want more spices, add them- want less? Add less! Ahh, I love it.
As I'm trying to go unprocessed for the month, I was really making an effort to use unprocessed materials. This can of chipotles was the only thing I was concerned with, but the sugar was the only thing on that list that really bothered me and I decided to use them because of the flavor they add. I think it was worth it.
While the meat is browning start opening up your canned goods. I use a large can of diced tomatoes, a small can of tomato sauce and two types of canned beans. I'm particularly fond of black beans. Can you see my second can hiding there behind the pinto beans? I love them and often use only black beans in my chili.
When the meat is brown, add the canned goodness and mix it up.
Now, open the can of chipotles and grab a couple out with a fork. They look like big, gooey raisins, don't they? Chop up one chipotle per batch of chili and toss it in.
As a note, don't see the delicious looking chipotle sauce on your palm and lick it off. You might regret this. It's a tad bit spicy. Don't do this over and over as you cook the chili, because that would just be silly.
Here is my secret, shhh, ingredient. Cocoa powder! I really love this addition. I think it really adds that kick that will make people wonder what in the heck you did with your chili. Again though, if that seems like too much- you can leave it out.
Look at that cocoa powder settling in. Isn't it gorgeous? It does smell a bit interesting at this point, you will wonder if you're making brownies for about 24 seconds, until you lick that adobo sauce off your palm and smell the chili powder.
Oh, chili. It's an amazingly hearty dish. It can be so comforting and inviting. You can do so much with it and it freezes well! Seriously, what's not to love? At this point you should taste it and add salt or pepper or anything else you think it needs!
Like cheddar cheese and green onions. Fab.
Chili
1 onion, diced
2 garlic cloves, chopped
1-2 pounds of ground meat of your choice
1 teaspoon cayenne pepper
1 teaspoon salt
1 teaspoon cumin
1 tablespoon chili powder
1 large can of diced tomatoes
1 14 oz can of tomato sauce
2 cans of beans of your choice
1 chiptole in adobo, chopped, plus a spoonful of adobo sauce
1 heaping tablespoon of cocoa powder
topppings of your choice
Start by heating oil up in a large pot. Cook up the onions and garlic on medium heat, until they are tender. Then throw in the meat and turn up the heat. After it has browned a bit, add the spices and continue cooking.
After the meat is browned, add the canned goods and stir it up. Bring it to a boil and add the chipotle pepper, sauce and the cocoa powder. Simmer for at least 30 minutes and serve with whatever your heart desires!
Enjoy!
-m
Friday, July 22, 2011
Creamy Cauliflower Soup
I have been searching for a creamy cauliflower soup ever since I had a delicious, enlightening soup at the California Academy of Sciences. Yes. At a museum type place I had an existential experience with soup. Twice. And I would go again not only for the indoor rain forest or albino reptile but for the cauliflower soup. I broke down this week and instead of racing to San Francisco to get some, I decided to make my own.
The only problem, I couldn't find a recipe that looked good.
So, I winged it. I skimmed through a few recipes, noticed that they sauteed some garlic/onions/cauliflower then cooked the cauliflower in some liquid for a bit before pureeing it. This is one thing I love about cooking, the patterns. Once you figure them out, the world is your oyster. Or, I hope it is because that's what I keep telling myself. Find. The. Patterns.
I knew I wanted to add heavy cream/whole milk because I had some on hand and had to use it before it went bad and my guilt at wasting food and money kicked in. I also knew that thyme would go well and that I wanted to use some lovely shallots. I was hoping to make it using things I had at home, and I think I succeeded!
It is the easiest soup ever, in my honest opinion, and it is so delicious. I'm fantasizing about the leftovers in the freezer, and planning my next big ol' batch. I will thank myself in about two months when I'm exhausted from a day of teaching and I just want something relatively healthy and filling for dinner. :) You are welcome, future me.
Creamy Cauliflower Soup
Ingredients
1 tbsp butter
2 shallots, diced
1 head of cauliflower, chopped into florets (or 1-inch pieces really)
4 cups vegetable broth
3 sprigs of thyme
½ cup heavy cream
½ cup milk
salt
pepper
Start by melting the butter in a large pot over medium heat. When the butter is melted add the shallots and cook until translucent, about 4-6 minutes. Toss in the chopped cauliflower, and don’t worry about how the florets look- you are going to blend the heck out of them! Toss with the shallots and cook for a few minutes, just to bring some of the flavors together.
Pour the broth into the pot and toss the thyme on top. Bring the whole shebang to a boil. When it is boiling and bubbling, cover it and turn it down to simmer for about 15-20 minutes or until the cauliflower is tender.
When the cauliflower is tender, turn off the heat, grab the thyme sprigs and throw them out, and blend the soup mixture. I used my immersion blender and it whipped the soup up fast but this could also be done in batches with a regular blender, just be sure to let the heat escape. Then (put it back in the pot if you used a regular blender), mix in the milk and heavy cream and bring the heat back on for a bit and add salt and pepper to taste. Let it warm up on the stove for a few minutes to help the flavors get along and to be sure you have the consistency and taste you desire. Viola! Creamy, satisfying soup.
Enjoy!
-m
Friday, July 15, 2011
Freezer Stash

Look what I'm going to cut up and put in my freezer...delicious strawberries! I bought a ton of them and I'm trying to think of things other than smoothies that could utilize the frozen deliciousness in say, December.
Maybe this cake? It has barley flour and just a hint of sugar. It was perfection. I think sometime in December or January, when I'm sick of cinnamon and peppermint, that this might make an appearance.
Wednesday, July 13, 2011
Absent Minded

I made a pretty delicious vegetable curry last night. I attempted to photograph parts of the process, but totally forgot to photograph the end result. Psh. It's all about the journey right, not the destination? Here's an image of the journey then for you. This is about 75% of the way done. Just needs to simmer and add the cream and peas. I'll let the link do the talking in terms of recipe and such and I'll try to remember to take a picture of the end result next time (Hint: I'm going easy on myself and it will be a smoothie.. I think I can handle remembering things through that whole process)
Since I can't share what the meal looked like, I'll share some other things that are putting a skip in my step. For example, I'm excited! As part of this whole good food move I'm making I decided to follow some sage advice and get a little freezer for the garage. I have these dreams of making soups and stews and buying berries in bulk at the farmers market so I can store them in all their goodness.

I bought the freezer on craigslist. I did research on types of freezers, sizes, frost settings, and all that. I looked at home improvement store websites and cringed at the idea of spending over $200. I just want to see if I actually use it before I go investing in it. Then: Bing! Craigslist. I love that little site. I know most people have a kind of love/super hate relationship with the big guy, but I adore it. I get a little addicted to selling stuff on there, which is why it's so healthy for me to forget about it!
That little (big!) freezer cost $60! deal deal deal. Sold.
I really wanted to buy those deli containers Ina Garten uses on her show- you know, with her homemade stock and berries she pops right out of her freezer? It seems so satisfying, the way she unscrews the lid and the heavenly stuff gets ready for its intended purpose. But I couldn't find them near me and I'm not ready to pay shipping on small, plastic containers similar but not exactly like ones I can find at Smart and Final. So- I bought some not-quite-the-same plastic containers at Smart and Final! Yay- or, we'll see.
Part of the freezer plan is to make a bunch of goodies so that during the school year I can have fresh, delicious (fingers crossed) good food whenever I want. I'm trying to figure out my labeling options. Ideally, I want to recycle these bad boys. Use 'em again and again. But given their 'fragile' state (they are not very thick/durable seeming) that might not be an option.
Another tool in my arsenal of good food is my salad bar. That's what I'm calling the planter box where I very neatly planted some herbs and a bunch of lettuce seeds. Then my big dog dug up a bunch here and there and now I'm just hoping something pops up sometime. I know, or am pretty sure, that it's not the best time to plant little seeds but what's a girl to do? Wait until next spring? No thanks. Also, I get a little impulsive when an idea strikes my fancy and I research and think it through, then go a little nutty and have to do it all right right right now. Do you know what I mean? It's like an itch. I have to scratch it.

Isn't it pretty? This is before the digger got it. The herbs are behind me in the shot, and they're doing ok. Little aphids or other small bug tried to get to them, but I got rid of them . I'm so handy.
-m
Subscribe to:
Posts (Atom)